M5Unit 8Servos - push button input
-
Hello everybody
I would like to use this unit as push button extension. In the examples codes i saw that this module can handle input and output. But there is no description if pins are already debounced and no schematic how the button should be connected is provided.
Does anybody know how to manage this? -
@swasi This product?
https://docs.m5stack.com/en/unit/8Servos Unit
And what button? -
@teastain yes, exactly this unit.
My push button is a cheap metal 1NO push button from aliexpress
https://de.aliexpress.com/item/4000962003511.html?spm=a2g0o.productlist.main.29.28681ZX81ZX8eV&algo_pvid=980580c4-cbbf-4562-8505-6208e49f88f1&algo_exp_id=980580c4-cbbf-4562-8505-6208e49f88f1-14&pdp_npi=4%40dis!CHF!1.57!1.57!!!1.68!1.68!%402103010b17167024952887064e1da1!10000012730074410!sea!CH!2358164638!&curPageLogUid=D8W0ybIwBZDH&utparam-url=scene%3Asearch|query_from%3AMy idea is to connect it to one port of the M5Unit 8Servos.
The example on github is here.
https://github.com/m5stack/M5Unit-8Servo/blob/main/examples/DIGITAL_INPUT_OUTPUT/DIGITAL_INPUT_OUTPUT.inoI don't know if i have to connect the push button between S and G on the 8Servos Unit or between V and S. And i'm wondering if i have to debounce the push button in hardware with an RC filter or it's already done in the unit. Or can i debounce the button in my arduino code?
-
@swasi Do Not connect it to V and S as it will destroy the input pins.
V is at 5V but the I/O pins only accept 3.3V.
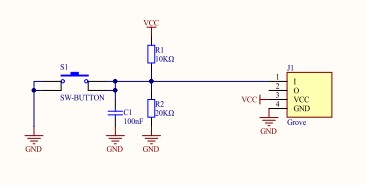
You need to use a circuit like this (the M5stack buttons)

-
@ajb2k3 thank you very much for your suggestion.
I think i should pull out my multimeter and check what happens, if i configure the port as input.
Maybe I'll find out, how it's working.The M5buttons schematics shows how to debounce the button input. Thank you very much for this picture.
-
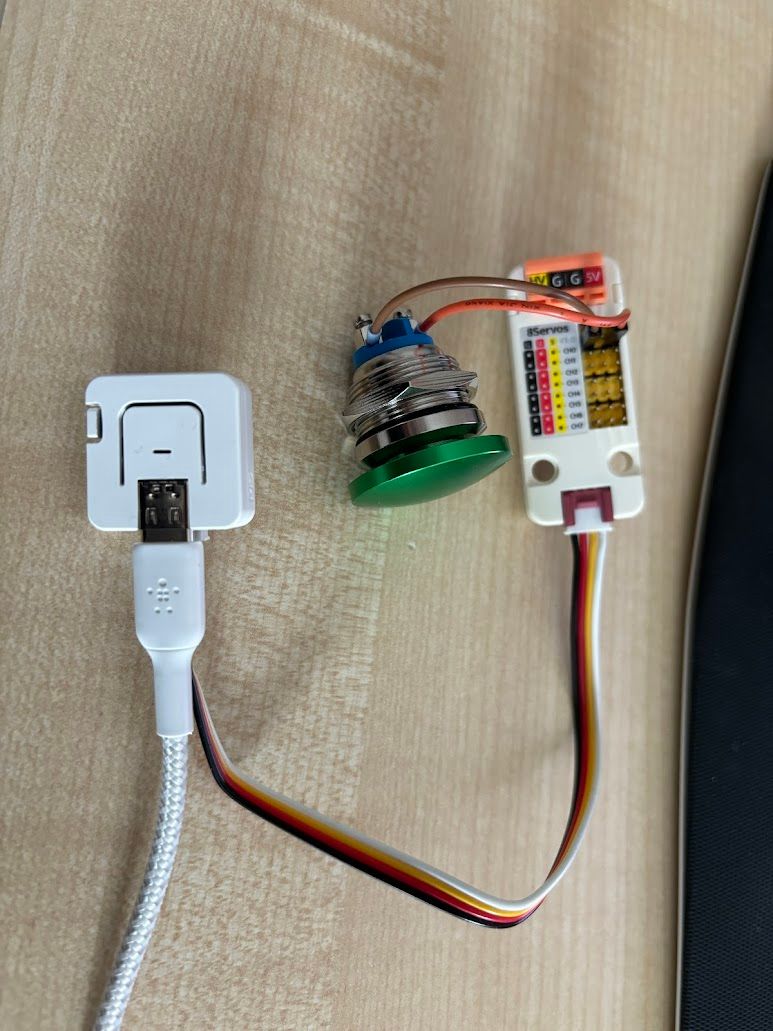
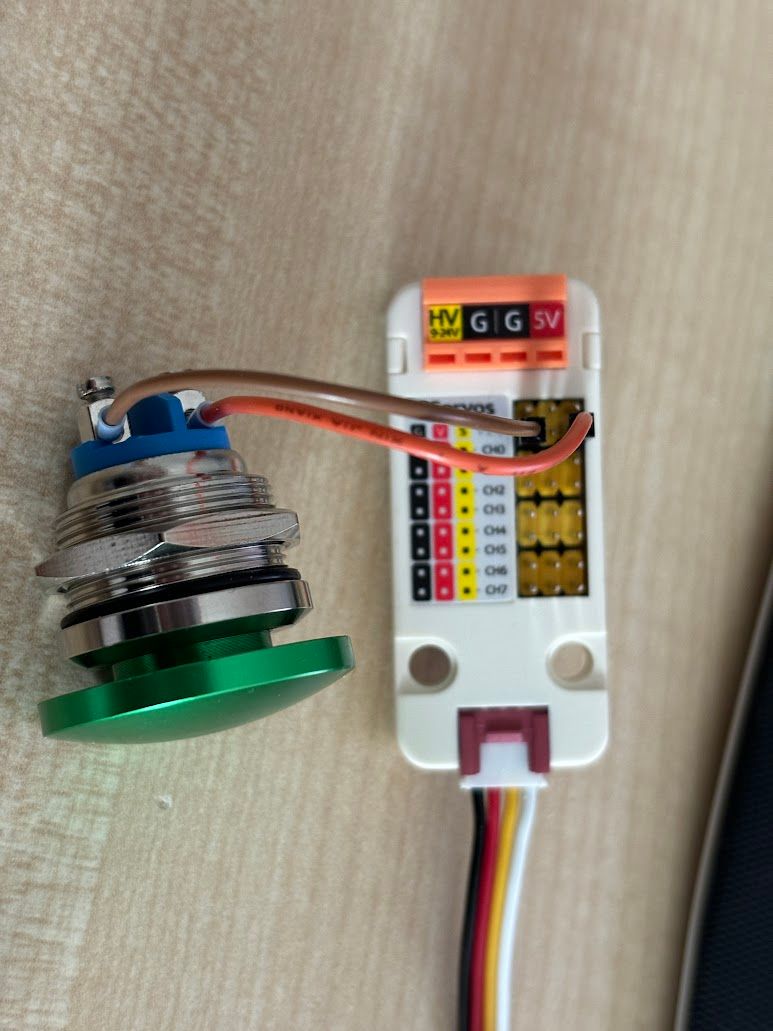
I've managed to read button clicks from M5Unit 8Servos.
Here is how i connected the button to the unit.


I've managed to read button click from M5Unit 8Servos with this code.
I'm using an M5Stack AtomS3 Lite.#include <Arduino.h> #include <M5Unified.h> #include <Wire.h> #include <M5_UNIT_8SERVO.h> #define SERVO_PIN 0 #define START_BUTTON_PIN 1 // put variables here: M5_UNIT_8SERVO unit_8servo; bool btnState; unsigned long btnClieckedMs; // put function declarations here: void setup() { M5.begin(); Serial.begin(115200); Serial.println("### Setup - start"); while (!unit_8servo.begin(&Wire, G2, G1, M5_UNIT_8SERVO_DEFAULT_ADDR)) { Serial.println("extio Connect Error"); delay(100); } //unit_8servo.setAllPinMode(SERVO_CTL_MODE); unit_8servo.setOnePinMode(SERVO_PIN, SERVO_CTL_MODE); unit_8servo.setOnePinMode(START_BUTTON_PIN, DIGITAL_INPUT_MODE); btnState = false; Serial.println("### Setup - end"); } void loop() { bool prevBtnState = btnState; // save last state for comparison btnState = unit_8servo.getDigitalInput(START_BUTTON_PIN); // read new state if(prevBtnState == false && btnState == true) { // if state has changed btnClieckedMs = millis(); // save millis } else if(prevBtnState == true && btnState == false) { // if state has changed again if(millis() - btnClieckedMs > 50) { // check how long it took from 'false' to 'true' (debounce) Serial.print("Button clicked "); // do some fancy things when button clicked Serial.println(btnClieckedMs); } } }