Lesson 10. Radio 433 MHz. Alaram system
-
The purpose of this lesson
Hi! Today we will make a simple security system using a pair of radio modules (FS1000A and MX-JS-05V), which operates at a frequency of 433MHz (depending on your region, the frequency may be slightly different) (Fig. 1 - 1.1). Learn how to make by yourself wireless penetration sensor based on the module HC-SR501.
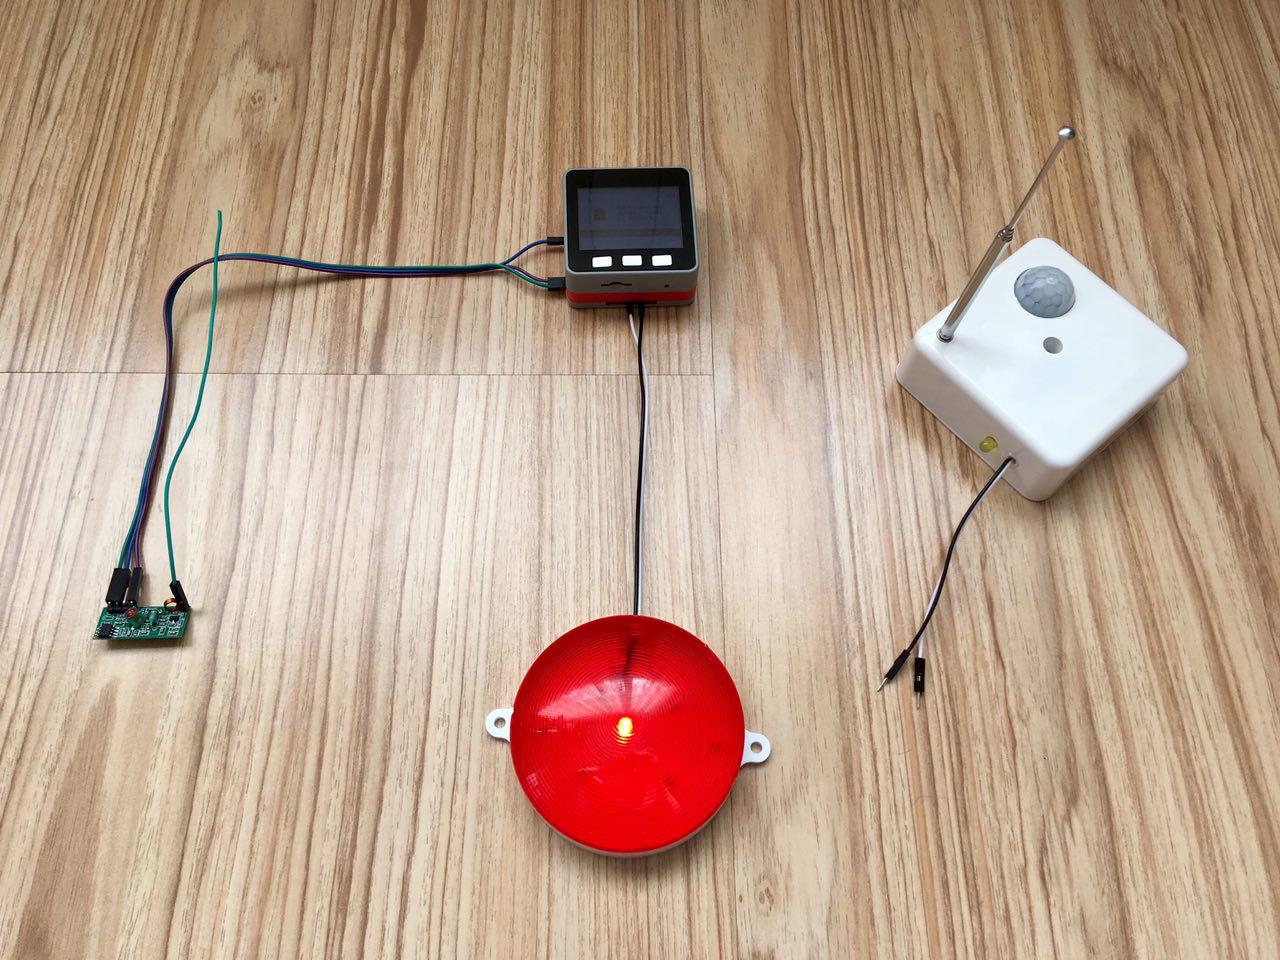
Figure 1.

Figure 1.1
The center of the system will be the M5STACK with a connected radio and a red light beacon.
We will do wireless penetration sensor with our hands. The sensor will be connected to a DC voltage of 5 V. when the sensor is disconnected from the power supply or when removed from the range of the wireless network, the Central unit will signal a flashing beacon and an audio signal.
It will also be possible to suspend protection using the Central button for a specified interval.
List of components for the lesson
- M5STACK;
- USB-C cable from standard set;
- colored wires from the standard set (socket type-plug);
- colored wires are not from the standard set (socket type-socket);
- radio MX-JS-05V;
- light-beacon. Supply voltage: 5V;
- radio transmitter FS1000A;
- telescopic antenna. Length: 17.3 cm;
- HC-SR501 motion sensor module;
- Arduino Nano;
- male dowelled PLS-10;
- the led is orange. Supply voltage: 3.3 V;
- resistor: 220 Ohm;
- hotmelt;
- drill;
- drill. Diameter: 2mm;
- drill. Diameter: 3.5 mm;
- drill. Diameter: 5mm;
- feather drill. Diameter: 23mm;
- marker or marker pen;
- ruler;
- calliper.
A little theory
Today we cannot imagine life without radio communication. When we drive up to our house we use the remote control to open the garage door. When guests come to visit us, they press the wireless button to make a call. When we walk through the Mall we don't care about our car. And that's just a few of the examples. The main thing is that it unites-decimeter range (in our case 433 MHz). Thanks to the work of great engineers and programmers, we can easily use this radio in our projects (Fig. 2).
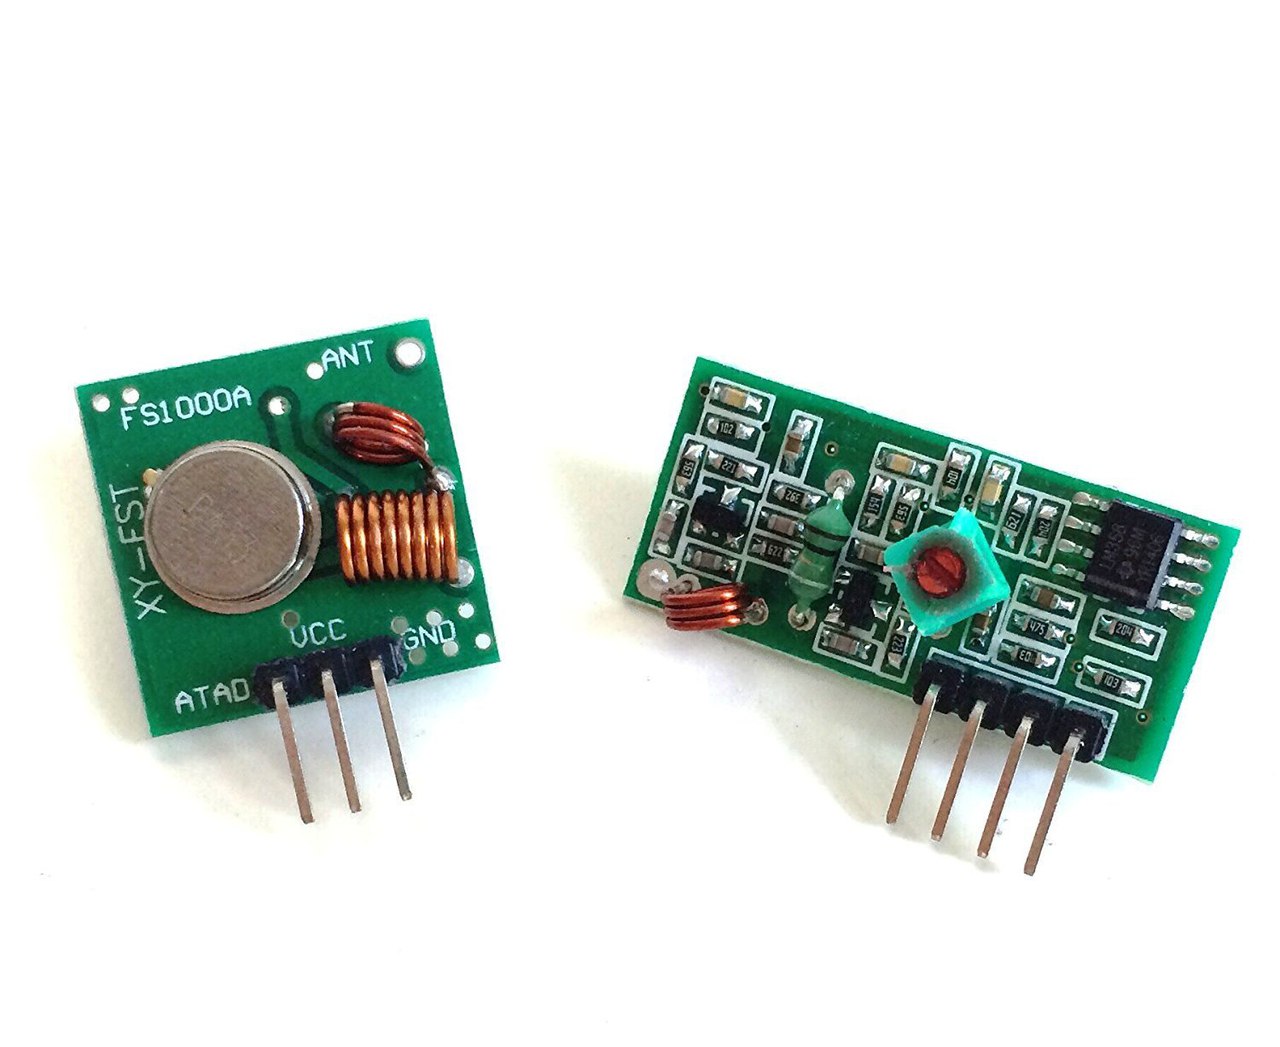
Figure 2. Transmitter on the left, receiver right
Let's get acquainted with the technical characteristics of this pair:
- transmitter supply voltage: 3-12V;
- receiver supply voltage: 5V;
- carrier frequency: 433MHz;
- transmitters current consumption: 8mA;
- receiver current consumption: 4.5 mA;
- receiver sensitivity: -106 to -110 dBm;
- transmitter output power: 32 mW;
- the maximum capacity of transmitter: 8 KB/s;
- the maximum capacity of the receiver: 5 KB/s;
- operating temperature range: -20 to 80 °C.
Now let's look at the motion sensor module HC-SR501 (Fig. 2.1).

Figure 2.1. The movement sensor module HC-SR501
The principle of operation of the module HC-SR501 is the registration of infrared radiation from a moving object. Sensitive element pyroelectric sensor 500BP. It consists of two elements of prisoners in the same building. The sensing element is closed by a white Fresnel dome lens. Features Fresnel lenses are such that the infrared radiation from the moving object falls first on one element of THE 500bp sensor, then on the other. The chip monitors the change of the signal from the sensor and generates a logic signal at the output according to the parameters set by the variable resistors and jumper (Fig. 2.2).

Figure 2.2.
In l mode, the output is set to a high level at the initial registration of the movement. The high output level remains during the timer operation, which is set by the "Time adjust" string resistor. At this time, the sensor does not respond to other events.
In H mode, each moving object restarts the timer. That means that the first fixed object at the exit of the HC-SR501 presence detector generates a high level and is maintained as long as there are movements in the detection zone.
With the "Sensitivity" resistor you can change the sensitivity of the module, thereby changing the radius of coverage.Begin!
Step 1. Draw a diagram of a wireless motion sensor
The sensor brain will make an inexpensive Arduino Nano tab, it is convenient first of all by accessibility on the market today. Here we connect the led to the contact D3, a radio transmitter FS1000A to the contact D4, and motion module HC-SR501 on contact D5. The power supply for all modules will be done from the Arduino Nano with 5V. The Board Arduino we are going to feed from the DC link voltage of 5 V To the contact VIN. Earth for all devices in General, is tightened to GND. Thus we obtain the following scheme of inclusion (Fig. 3).

Figure 3. Switching circuit of wireless motion sensor modules
Step 2. Choose the right body
As the case you can use, for example: plastic junction box from the power supply network (can be found in the electrical shop) (Fig. 4). In this case, the body dimensions are 70 x 70 x 29 mm.

Figure 4.
The future location of the modules is shown well in figure 3. Let's talk about it in more detail in the next steps of this tutorial.
Step 3. Preparation for work
First of all, you need to make holes in the body with a drill. Prepare the workplace: remove all unnecessary things, put a wooden Board under the body of the device, so as not to damage the table or use a special workbench.
Attention! Perform actions under the supervision of adults and observe safety precautions.
Check out the drawing showing the location of the holes in the housing of our future device in figure 5.

Figure 5. Drawing
Step 4. Installation of motion sensor module
Use the ruler to measure the distance you need and apply the point with a marker, take a drill, set the drill diameter 3.5 mm and make a hole (Fig. 6).

Figure 6. Drilling holes with a diameter of 3.5 mm
Now, install a 23 mm diameter drill bit and drill a larger hole on top (Fig. 6.1).
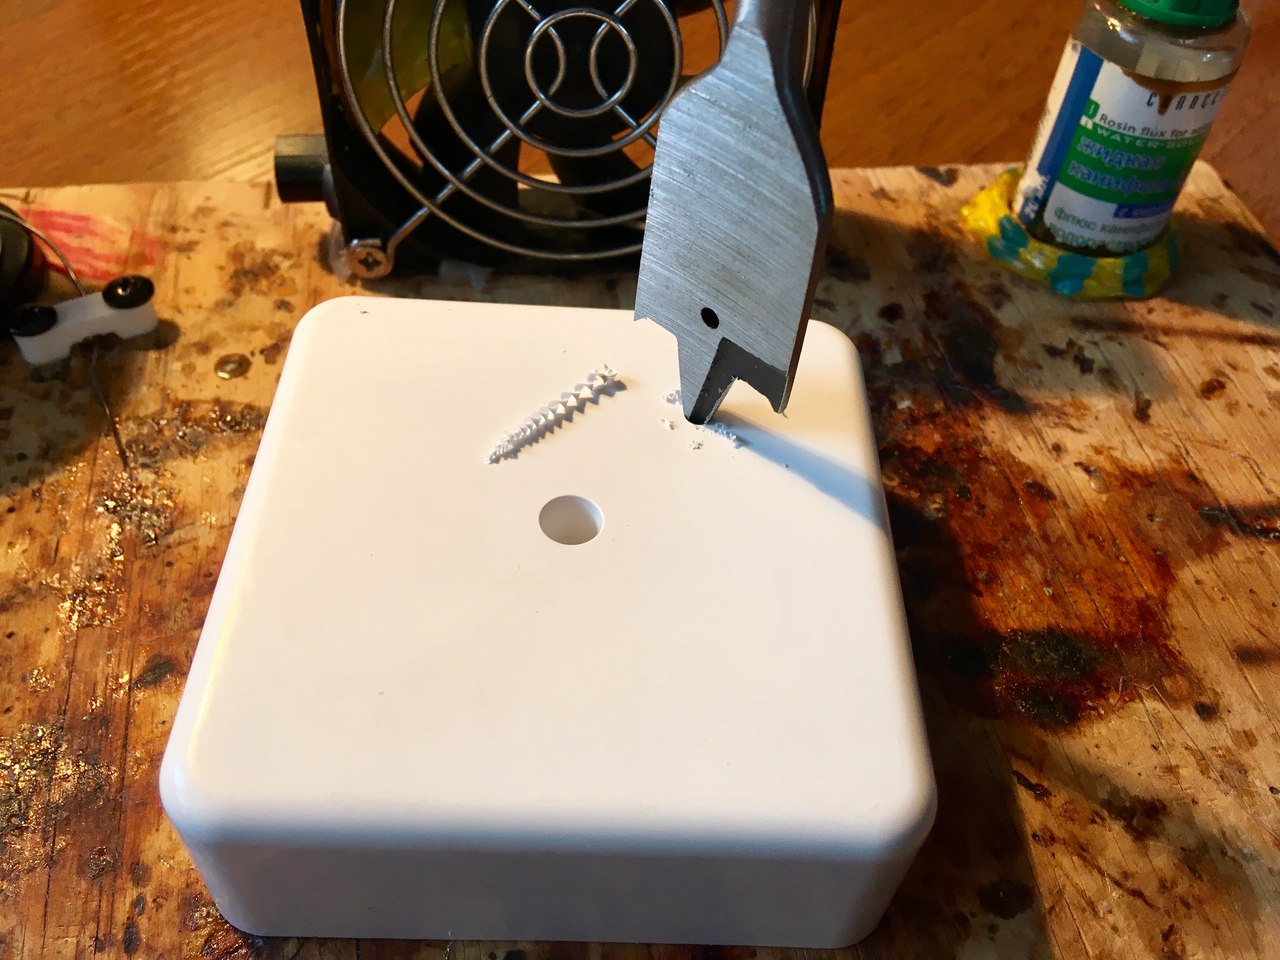
Figure 6.1. Drilling hole diameter: 23 mm
After the hole has been drilled, clean the housing from plastic chips (Fig. 6.2-6.3).

Figure 6.2.
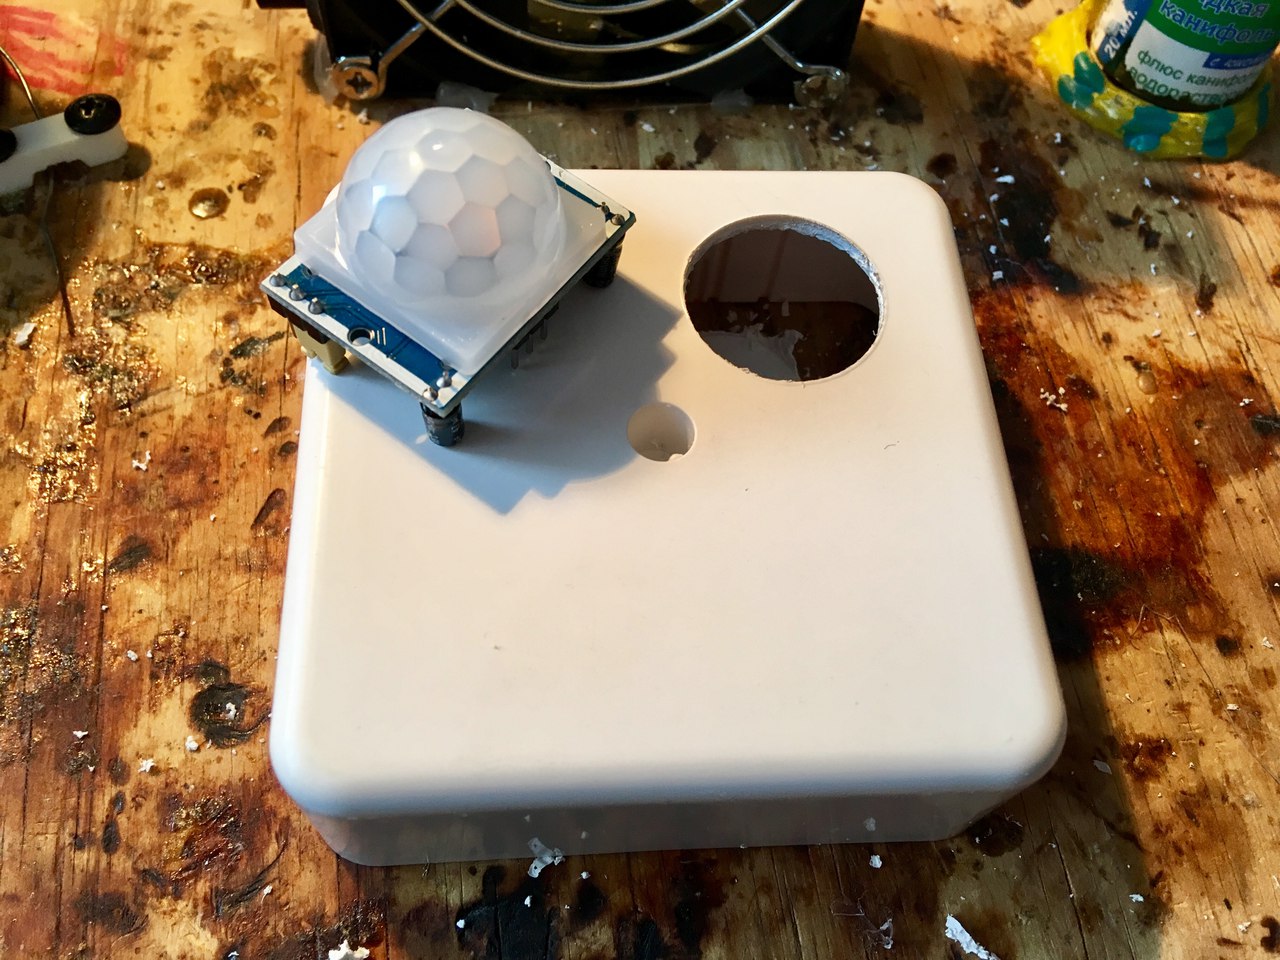
Figure 6.3. The module is ready for installation
Turn the case over, install the module exactly and fix it with a thermal glue (Fig. 6.4-6.5).

Figure 6.4

Figure 6.5
This completes the installation of the motion sensor module.
Step 5. Installation of radio transmitter module and antenna
Similarly with a ruler measure the desired distance, and apply a dot with a marker, take the drill, install the drill bit with a diameter of 2 mm and make otverstie (Fig. 7 - 7.1).
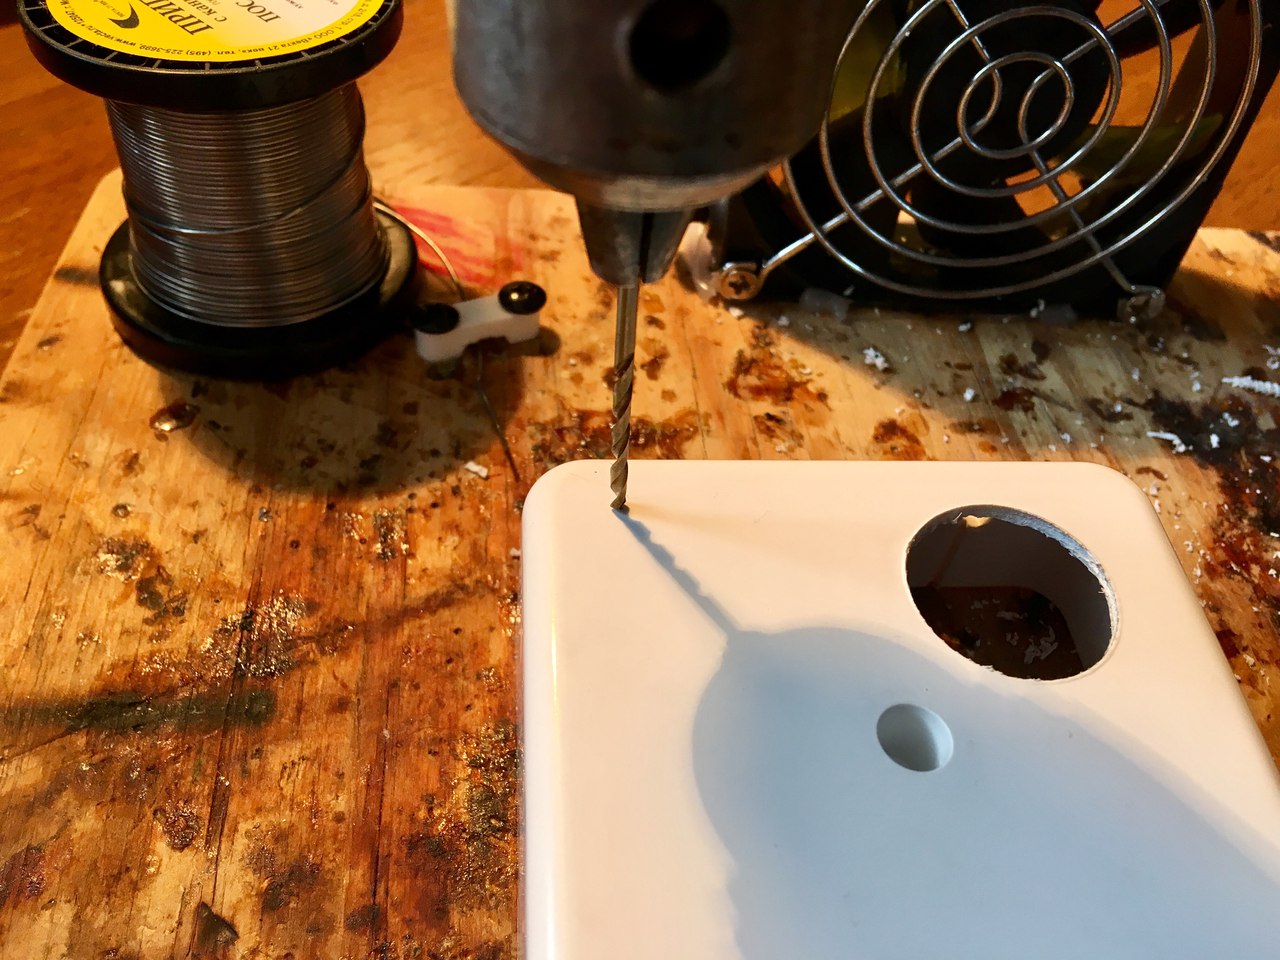
Figure 7. Drilling holes with a diameter of 2 mm

Figure 7.1
Solder the conductor with the ring at the end to the hole on the module labeled ANT (Fig. 7.2).

Figure 7.2
Screw the screw and washer onto the conductor (Fig. 7.3).

Figure 7.3
Install the module in the housing and fix it with a thermal glue (Fig. 7.4). Hold the telescopic antenna on the back of the case.

Figure 7.4
This completes the installation of the radio transmitter and antenna.
Step 6. Holes in the side wall
Make holes in the side wall and install a cable type (plug socket) (Fig. 8 - 8.1) and led.

Figure 8. Drilling holes with a diameter of 3.5 mm

Figure 8.1. Drilling holes with a diameter of 5 mm
Shorten one of the legs (+) of the led and solder the resistor 220 Ohms. Use heat shrink for insulation (Fig. 8.2).

Figure 8.2.Next, install the led in the housing (Fig. 8.3).

Figure 8.3.
This completes the installation of the led and power wires.
Step 7. Do couplers wires
Take and bite off with the help of pliers plug type PLS-10 in half. With the help of cut off legs from unnecessary radio components solder jumpers to all contacts become closed (Fig. 9). You should get two multipliers.

Figure 9.
Step 8. Installation of Arduino Nano and wires
The final point is the installation of Arduino and installation of all conductors. Use the multipliers to the power supply circuit and earth. To make sure that the wires do not take up much space-screw them on the marker (Fig. 10).

Figure 10.
Connect all conductors (Fig. 10.1) according to the scheme of inclusion in figure 3.

Figure 10.1
On this installation is fully completed (Fig. 10.2).

Figure 10.2
Step 9. Write on a sketch for a wireless sensor
To work with FS1000A on the Internet there are many different versions of libraries. I suggest to use a library written by the wonderful guys from the site iarduino.ru. Complicated to use, so nothing special there. Initialize an instance of the class, passing it the number of the contact to which the radio is connected iarduino_RF433_Transmitter radioTX (radio); using the radioTX method.begin(1000); set the transmission speed in bit/s. Even, the developer have added the ability of the "pipes", as if the channels on which to transmit data without interfering with each other. The number of pipes can be changed anywhere from 0 to 7. radioTX.openWritingPipe(0);
#include <iarduino_RF433_Transmitter.h>

int led = 3;
int radio = 4;
int pir = 5;
String sensorId = "ir-1";
unsigned long prevTime = 0;
iarduino_RF433_Transmitter radioTX(radio);

void sendString(String str) {
  int len = str.length() + 1;
  char bfr[len];
  str.toCharArray(bfr, len);
  int n = 24 / str.length();
  for (int i = 0; i < n; i++)
  {
    radioTX.write(&bfr, sizeof(bfr));
  }
}

void setup() {
  pinMode(led, OUTPUT);
  pinMode(pir, INPUT);
  prevTime = 0;
  radioTX.begin(1000);
  radioTX.openWritingPipe(0);
}

void loop() {
  if (digitalRead(pir) == LOW)
  {
    if ((millis() - prevTime) >= 3000)
    {
      prevTime = millis();
      sendString(sensorId + String((char)0x1d) + "LOW");
      digitalWrite(led, HIGH);
      delay(70);
      digitalWrite(led, LOW);
      delay(30);
    }
  }
  else
  {
    sendString(sensorId + String((char)0x1d) + "HIGH");
    digitalWrite(led, HIGH);
    delay(25);
    digitalWrite(led, LOW);
    delay(25);
  }
}
I wrote a simple function to send a string of up to 24 characters. If the string is shorter, it will be passed repeatedly. The purpose of some noise immunity.
The principle of operation is that every 3000 MS the sensor sends its sensorId + value received from the motion module - LOW and flashes with the led. If a HIGH signal is received, the sensor will immediately send out the appropriate level and blink the led more often.You can connect Arduino Nano and load this sketch.
After that, the sensor cover can be closed.
Step 10. Write a sketch for the wireless security center
Note the difference between the header file names. Action of the preparation of the receiver to work similar to the action of the preparation of the transmitter. The receipt of data from one of the pipes can be monitored using the radioRX method.available (&k), where k is the pipe number. Reading is performed using a method call radioRX.read (&j, sizeof (j));, where j is an array of 24 characters.
#include <M5Stack.h>
#include <iarduino_RF433_Receiver.h>

int radio = 5;
int beacon = 22;
uint8_t k;
char j[24];
unsigned long currentTime;
unsigned long prevTime = 0;
extern unsigned char beacon_logo[];
iarduino_RF433_Receiver radioRX(radio);

void alaram() {
  while (true)
  {
    if (m5.BtnB.wasPressed()) break;
    digitalWrite(beacon, HIGH);
    m5.Speaker.tone(800);
    delay(150);
    digitalWrite(beacon, LOW);
    m5.Speaker.mute();
    delay(150);
    m5.update();
  }
  digitalWrite(beacon, LOW);
  m5.Speaker.mute();
  m5.update();
  int suspendTime = 15;
  for ( ; suspendTime > 0; suspendTime--)
  {
    message("protection suspended " + String(suspendTime) + "s");
    delay(1000);
  }
  message("At protecting...");
}

String parseString(int idSeparator, char separator, String str) { // like a split JS
  String output = "";
  int separatorCout = 0;
  for (int i = 0; i < str.length(); i++)
  {
    if ((char)str[i] == separator)
    {
      separatorCout++;
    }
    else
    {
      if (separatorCout == idSeparator)
      {
        output += (char)str[i];
      }
      else if (separatorCout > idSeparator)
      {
        break;
      }
    }
  }
  return output;
}

void message(String text) {
  M5.Lcd.fillRect(0, 160, 320, 30, 0x7bef);
  M5.Lcd.setCursor(10, 167);
  M5.Lcd.setTextColor(0xffff);
  M5.Lcd.print(text);
  M5.Lcd.setTextColor(0x7bef);
}

void setup() {
  m5.begin();
  M5.Lcd.fillRoundRect(0, 0, 320, 240, 7, 0xffff);
  M5.Lcd.setTextColor(0x7bef);
  M5.Lcd.setTextSize(2);
  M5.Lcd.drawBitmap(35, 70, 59, 59, (uint16_t *)beacon_logo);
  M5.Lcd.setCursor(120, 70);
  M5.Lcd.print("RADIO 433 MHz");
  M5.Lcd.setCursor(120, 90);
  M5.Lcd.print("ALRAM SYSTEM");
  M5.Lcd.setCursor(120, 110);
  M5.Lcd.print("ON M5STACK");
  message("radio is starting");
  pinMode(beacon, OUTPUT);
  radioRX.begin(1000);
  radioRX.openReadingPipe(0);
  radioRX.startListening();
}

void loop() {
  if (radioRX.available(&k))
  {
    radioRX.read(&j, sizeof(j));
    delay(1);
    String sensorInfo = parseString(0, (char)0x1d, j);
    String sensorType = parseString(0, '-', sensorInfo);
    String sensorId = parseString(1, '-', sensorInfo);
    if (sensorType == "ir")
    {
      prevTime = millis();
      String data = parseString(1, (char)0x1d, j);
      if (data == "HIGH")
      {
        message("Attention for " + sensorInfo);
        alaram();
        prevTime = millis();
      }
      else
      {
        message("At protecting...");
      }
    }
  }

  if ((millis() - prevTime) >= 10000)
  {
    message("Sensor unavailable.");
    alaram();
    prevTime = millis();
  }
}
The principle of the center is to wait for data from the sensor. If the data is not coming on time (within 10 s), the alarm sounds and the beacon. To suspend protection for 15 seconds, press the B (Central) button.
You can connect M5STACK and upload this sketch.
After that, do not forget to connect the radio and the beacon to the appropriate contacts.
Step 11. Launch!
In the section "Download" attached video demonstration. The lesson is completed.
HOMEWORK
- Task 1 difficulty: make additional holes for the screwdriver to adjust the resistors on the motion sensor module;
- Task 2 difficulty levels: make a different sound and light signal for different types of alarm: when the sensor is not connected and when the sensor has detected movement;
- Task 3 difficulty levels: add an additional blue led to the sensor, signaling the recent movement (5 minutes later, for example);
- Task 4 difficulty levels: make automatic generation of unique addresses of sensors and automatically register them in the security center.
Download
- Images (Yandex Disk): https://yadi.sk/d/ayUhlbUq3UX9dF
- Applications (Yandex Disk): https://yadi.sk/d/P-c8Mchr3UX9tb
- Sketches (GitHub): https://github.com/dsiberia9s/Lesson-10.-Radio-433-MHz.-Alram-system
- Libraries (Yandex Disk): https://yadi.sk/d/1sqpIGOD3UXCbQ
- Video with demonstration of work (YouTube): https://youtu.be/r90Ivr68PCU
-
@dimi Great article, thanks. I was wondering if you could provide some better detail about the connections to the M5Stack, especially the 433Mhz receiver - looks like it goes to the grove port but is specified as Pin 5 in the code?